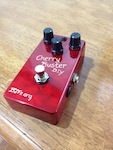
Cherry Buster Build Thread
Moderator: Moderators
Re: Cherry Buster Build Thread
Just a thought -- if it's really an issue getting the bi-color LED in to the holder, consider cutting the holder off just inside the enclosure and gluing it and the LED in place. Then the legs of the LED should probably start after the cut-off bottom of the holder and fit will no longer be a problem. 
Timing has a lot to do with the outcome of a rain dance.
BJFe: DIY CB, DIY FF 3.5%
BJFe: DIY CB, DIY FF 3.5%
-

cajone5 - Posts: 931
- Joined: Wed May 19, 2010 9:44 am
- Location: Austin, TX
- Guitars:: 2006 Taylor 214e
2014 Fender Strat 60th Anniversary
Mainland Tenor Uke - amps: 5e3 Deluxe
'68 Custom Deluxe Reverb - pedals: 99
Re: Cherry Buster Build Thread
Spent some time today making the remaining 2 boards. Took loads of pics, everything went much quicker and smoother today.
First, quick pics of the components :
Resistors in order:


Diodes:

Capacitors:

Other Stuff:

The board:

Uploaded with ImageShack.us
First, quick pics of the components :
Resistors in order:


Diodes:

Capacitors:

Other Stuff:

The board:

Uploaded with ImageShack.us
-

Gnash - Posts: 24
- Joined: Sat Aug 20, 2011 10:24 am
- Location: Land of Smiles
- Guitars:: D'Pergo, Ruokangas, Gustavsson, Gil Yaron, Teuffel
- amps: Kemper, 3rd Power British Dream
- pedals: 0
Re: Cherry Buster Build Thread
The order I usually do boards in is: Resistors, Diodes, Caps and then chips and transistors last.
Starting with Resistors:
I fitted a 'bank' of resistors to solder in first:

Then I popped a strip of tape over the top to keep them from moving around when I flip the board over to solder:

Ready to solder. I try not to bend legs on the components as it can make things difficult if you ever need to remove something later on.
This is why the tape is handy :
:

The first bank soldered in and trimmed with a sharp pair of snips ( never mind shoddy soldering, unfortunately the Iron I have at home is a veritable cricket bat )
)

Second bank in and soldered:


Starting with Resistors:
I fitted a 'bank' of resistors to solder in first:

Then I popped a strip of tape over the top to keep them from moving around when I flip the board over to solder:

Ready to solder. I try not to bend legs on the components as it can make things difficult if you ever need to remove something later on.
This is why the tape is handy

The first bank soldered in and trimmed with a sharp pair of snips ( never mind shoddy soldering, unfortunately the Iron I have at home is a veritable cricket bat

Second bank in and soldered:


-

Gnash - Posts: 24
- Joined: Sat Aug 20, 2011 10:24 am
- Location: Land of Smiles
- Guitars:: D'Pergo, Ruokangas, Gustavsson, Gil Yaron, Teuffel
- amps: Kemper, 3rd Power British Dream
- pedals: 0
Re: Cherry Buster Build Thread
Diodes followed the resistors ( no pics here ).
For those new to electronics, take care when bending the legs on the Zener Diode ( D4 ) as it is made from glass and can be damaged if your too rough with it ( Speaking from past experience )
)
Try to support the leg between the body and the place you want to bend ( some fine needle nosed pliers are ideal for this type of thing )
Capacitors took a while as I used multi strand wire to extend the legs - I cut each Caps legs down to about 4-5mm and then spliced on about 5-8mm of wire. This allows you to 'lean' the capacitor over, making it much easier to fit the board into the enclosure once it's finished.
I try to avoid using the Caps legs, even if they seem long enough, as once heat/solder is applied the legs can be very stiff and you risk doing damage to the boards tracks when you try to bend them ( things tend to move around and snap, and the solder points on the boards usually give before the caps legs will )
)
Finished board, front and back ( the splashes are mostly flux from the solder ):


For those new to electronics, take care when bending the legs on the Zener Diode ( D4 ) as it is made from glass and can be damaged if your too rough with it ( Speaking from past experience
Try to support the leg between the body and the place you want to bend ( some fine needle nosed pliers are ideal for this type of thing )
Capacitors took a while as I used multi strand wire to extend the legs - I cut each Caps legs down to about 4-5mm and then spliced on about 5-8mm of wire. This allows you to 'lean' the capacitor over, making it much easier to fit the board into the enclosure once it's finished.
I try to avoid using the Caps legs, even if they seem long enough, as once heat/solder is applied the legs can be very stiff and you risk doing damage to the boards tracks when you try to bend them ( things tend to move around and snap, and the solder points on the boards usually give before the caps legs will
Finished board, front and back ( the splashes are mostly flux from the solder ):


-

Gnash - Posts: 24
- Joined: Sat Aug 20, 2011 10:24 am
- Location: Land of Smiles
- Guitars:: D'Pergo, Ruokangas, Gustavsson, Gil Yaron, Teuffel
- amps: Kemper, 3rd Power British Dream
- pedals: 0
-

Gnash - Posts: 24
- Joined: Sat Aug 20, 2011 10:24 am
- Location: Land of Smiles
- Guitars:: D'Pergo, Ruokangas, Gustavsson, Gil Yaron, Teuffel
- amps: Kemper, 3rd Power British Dream
- pedals: 0
Re: Cherry Buster Build Thread
Thanks for the fantastic documentation Gnash! 
I would really like to see some photos of how you managed the capacitors before putting the heat shrink on, if you have some? I saw that the build by ohmydear had the caps standing... Just how tight is it?
Did you use the cathode or anode LED diagram? Hoping to get stuck into mine soon!
I would really like to see some photos of how you managed the capacitors before putting the heat shrink on, if you have some? I saw that the build by ohmydear had the caps standing... Just how tight is it?
Did you use the cathode or anode LED diagram? Hoping to get stuck into mine soon!
"The music business is a cruel and shallow money trench, a long plastic hallway where thieves and pimps run free, and good men die like dogs. There's also a negative side." - Hunter S. Thompson
-

ak47 - Posts: 421
- Joined: Tue Dec 20, 2011 5:52 pm
- Location: Sweden
- pedals: 0
Re: Cherry Buster Build Thread
ak47 wrote:Thanks for the fantastic documentation Gnash!
I would really like to see some photos of how you managed the capacitors before putting the heat shrink on, if you have some? I saw that the build by ohmydear had the caps standing... Just how tight is it?
Did you use the cathode or anode LED diagram? Hoping to get stuck into mine soon!
Hey ak47! I ended up using the Cathode LED diagram but with a single pole LED ( 2 leg LED ). Basically I made it exactly as per the diagram except I omitted the 'red' wire on the diagram that goes from the LED to the bottom of the 3PDT switch, marked boost off.
The bi-pole LEDS Cliff provided me are Anode common, so if you are using those ones you should use the Anode common diagram ( the one with the '-' center leg and the 2 '+' outer legs.
An easy way to check the LED is with a digital volt meter with a 'diode check' option. If you put the black lead on the center and the red on either side and the LED will light up if it's Anode common. ( for a 2 leg LED black on the short leg, red on the long one ).
I forgot to take pics of the Caps as I was doing them. I'll try to find a gash filter cap lying around and take some demo pics of how I do it for you though.
-

Gnash - Posts: 24
- Joined: Sat Aug 20, 2011 10:24 am
- Location: Land of Smiles
- Guitars:: D'Pergo, Ruokangas, Gustavsson, Gil Yaron, Teuffel
- amps: Kemper, 3rd Power British Dream
- pedals: 0
Re: Cherry Buster Build Thread
Right - Filter cap leg extensions:
Here we have a 47uf cap - basically similar to the ones used in the Buster, just a bit shorter.

Here I've snipped the legs down to about 3-4mm

Next prep 2 pieces of wire with twisted and lightly tinned ends ( when you 'tin' something you are pre-applying solder )

Here is the cap secured in my home made vise

Wide angle shot of the vise Alternatively, surgical forceps are very handy for electronics work if you can get your hands on a pair.

I hold the wire parallel to the leg, apply some solder to the tip and then solder the wire onto the leg. Takes less than one second to affix the wires like this so you should overheat anything. ( note my brutal old soldering Iron - I really need to replace this soon )

Post soldering operations, ready to trim down to size

The finished cap ready to be soldered onto your board and flexible enough to lie down flat.
One thing I should really be doing is applying some nice low temperature heat shrink to each leg to cover each solder joint. However I don't have any small enough in the house. Applying some heat shrink at this point will make it highly unlikely the capacitors legs could ever be shorted together.

So there you have it. Very basic, but you should get the general idea.
Hope this helps
Here we have a 47uf cap - basically similar to the ones used in the Buster, just a bit shorter.

Here I've snipped the legs down to about 3-4mm

Next prep 2 pieces of wire with twisted and lightly tinned ends ( when you 'tin' something you are pre-applying solder )

Here is the cap secured in my home made vise

Wide angle shot of the vise

I hold the wire parallel to the leg, apply some solder to the tip and then solder the wire onto the leg. Takes less than one second to affix the wires like this so you should overheat anything. ( note my brutal old soldering Iron - I really need to replace this soon )

Post soldering operations, ready to trim down to size

The finished cap ready to be soldered onto your board and flexible enough to lie down flat.
One thing I should really be doing is applying some nice low temperature heat shrink to each leg to cover each solder joint. However I don't have any small enough in the house. Applying some heat shrink at this point will make it highly unlikely the capacitors legs could ever be shorted together.

So there you have it. Very basic, but you should get the general idea.
Hope this helps
-

Gnash - Posts: 24
- Joined: Sat Aug 20, 2011 10:24 am
- Location: Land of Smiles
- Guitars:: D'Pergo, Ruokangas, Gustavsson, Gil Yaron, Teuffel
- amps: Kemper, 3rd Power British Dream
- pedals: 0
Re: Cherry Buster Build Thread
Thanks Gnash! This is proving to be very beneficial for my learning curve  Greatly appreciated!!!
"The music business is a cruel and shallow money trench, a long plastic hallway where thieves and pimps run free, and good men die like dogs. There's also a negative side." - Hunter S. Thompson
-

ak47 - Posts: 421
- Joined: Tue Dec 20, 2011 5:52 pm
- Location: Sweden
- pedals: 0
Re: Cherry Buster Build Thread
My kit arrived and it looks awesome! What is the difference between using the 2 LEDs sound wise? I'm new to pedal building and don't have a clue??
Thanks
Thanks
- mr. min t.fresh
- Posts: 17
- Joined: Sat Aug 22, 2009 4:34 pm
Return to Folk Forum (DIY projects)
Who is online
Users browsing this forum: No registered users and 0 guests


