Page 6 of 9

Re: Cherry Buster Build Thread

PostPosted: Sun Jan 20, 2013 5:50 pm
by Joeleo
Sounds awesome man, nice work!

Re: Cherry Buster Build Thread

PostPosted: Tue Jan 22, 2013 1:40 pm
by ak47
Joeleo wrote:Sounds awesome man, nice work!

Thanks! I love stacking this with my EGDM.. and there is something extra satisfying about having made it myself :mrgreen:

Re: Cherry Buster Build Thread

PostPosted: Thu Jan 31, 2013 5:16 pm
by thesjkexperience
I took the first step today! I sorted all the pieces and taped them to paper according to number and value. One HUGE problem I had was not being able to read the resistors at all. :banghead Fortunately, I bought a digital multi-meter a year ago and I measured all the resistors to get their values. It was so nice that Cliff bought quality parts as all the parts are really close to the value they are supposed to be.

I do not have a part that looks like Gnash's at the bottom of page 3 of this thread. Is that a problem?

Also, do you need to wrap the electrolytic caps to prevent shorts, or why does Gnash have those pink hats on his?

Finally, which part type have a specific input and output?

Off to pick up the twins from PK. Let's hope The Bear has been nice/good!

Re: Cherry Buster Build Thread

PostPosted: Thu Jan 31, 2013 11:39 pm
by cajone5
thesjkexperience wrote:I took the first step today! I sorted all the pieces and taped them to paper according to number and value. One HUGE problem I had was not being able to read the resistors at all. :banghead Fortunately, I bought a digital multi-meter a year ago and I measured all the resistors to get their values. It was so nice that Cliff bought quality parts as all the parts are really close to the value they are supposed to be.

I do not have a part that looks like Gnash's at the bottom of page 3 of this thread. Is that a problem?


Your caps may looks slightly different -- to keep costs low I pulled some parts from my own stash and didn't necessarily have 20 of the exact same looking caps. Just make sure you have the right values and you're AOK.

thesjkexperience wrote:Also, do you need to wrap the electrolytic caps to prevent shorts, or why does Gnash have those pink hats on his?


Nope. I was able to just place them in and lay them over (leave some lead length so you can bend it and lean it over to clear the case) on their sides. No reason to shrink wrap but you can if you'd like.

thesjkexperience wrote:Finally, which part type have a specific input and output?


The only polarized parts are the electrolitic capacitors and you can use the following to make sure you have the right polarity...

Image

thesjkexperience wrote:Off to pick up the twins from PK. Let's hope The Bear has been nice/good!


Good luck building! :pedallove

Re: Cherry Buster Build Thread

PostPosted: Fri Feb 01, 2013 1:58 am
by thesjkexperience
Thanks! I am so glad I do not have to look at those colors anymore! :clap: I know the page I printed out was a bit off due to using generic ink cartridges, but even using the photo on my monitor I couldnt guess what was going on. I was even looking through a loupe under a full spectrum desk lamp I use so I can do setups and wiring a bit easier.

Since the legs get stiff after soldering is it good to bend them first using needle nose pliers?

Re: Cherry Buster Build Thread

PostPosted: Fri Feb 01, 2013 7:52 am
by cajone5
thesjkexperience wrote:Thanks! I am so glad I do not have to look at those colors anymore! :clap: I know the page I printed out was a bit off due to using generic ink cartridges, but even using the photo on my monitor I couldnt guess what was going on. I was even looking through a loupe under a full spectrum desk lamp I use so I can do setups and wiring a bit easier.

Since the legs get stiff after soldering is it good to bend them first using needle nose pliers?
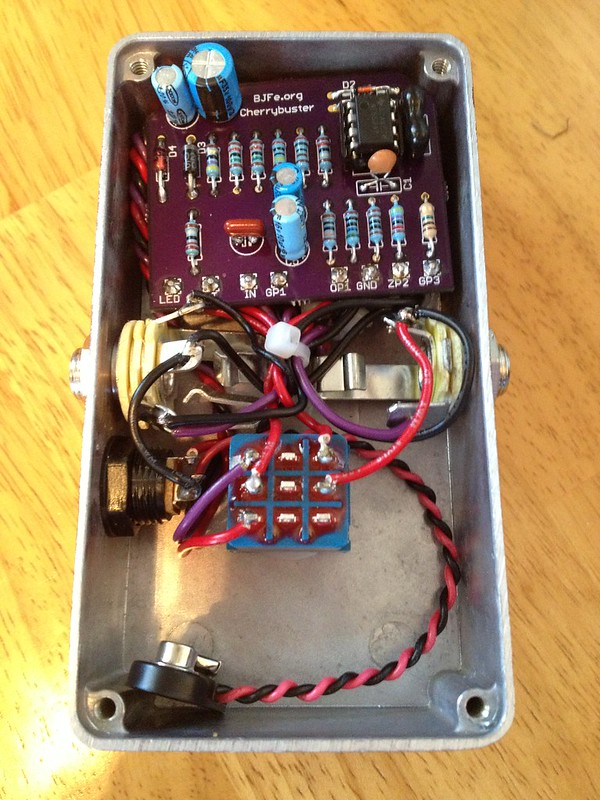

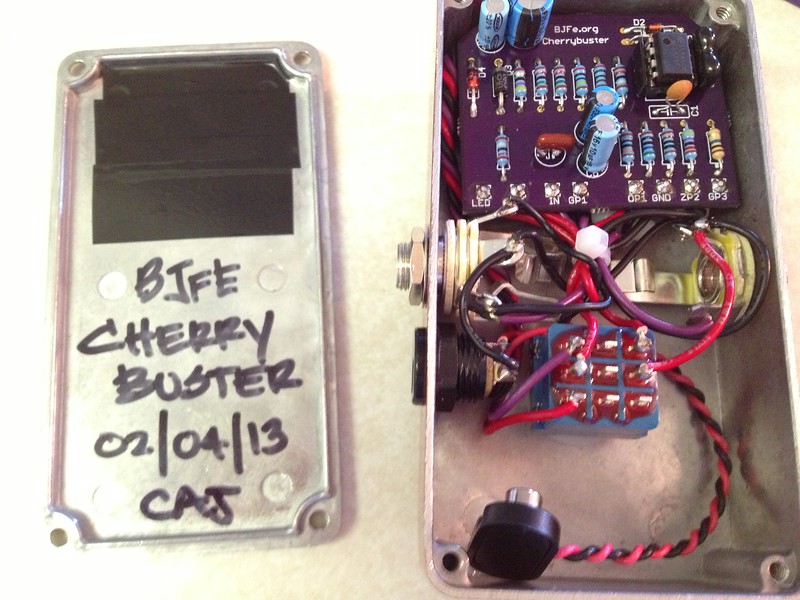
I typically do it that way. Bend legs and get placement the way you want it and then solder. I do the same for resistors and everything else to make it look prettier :thumbup:

Another tip -- place multiple components and use painters tape to hold everything in place. Then you can turn the board over and solder without things shifting around. :clown

Re: Cherry Buster Build Thread

PostPosted: Sun Feb 03, 2013 12:55 pm
by ak47
Glad to hear I am not the only one suffering 'resistor blindness' :crazy: I am digging this pedal more and more... I love it into my EGDM and was just playing around with it in front of my 5 watt Blackstar into a 4x12... crazy sounds! :mrgreen:

Good luck with the build! :thumbup:

Re: Cherry Buster Build Thread

PostPosted: Sun Feb 03, 2013 6:01 pm
by cajone5
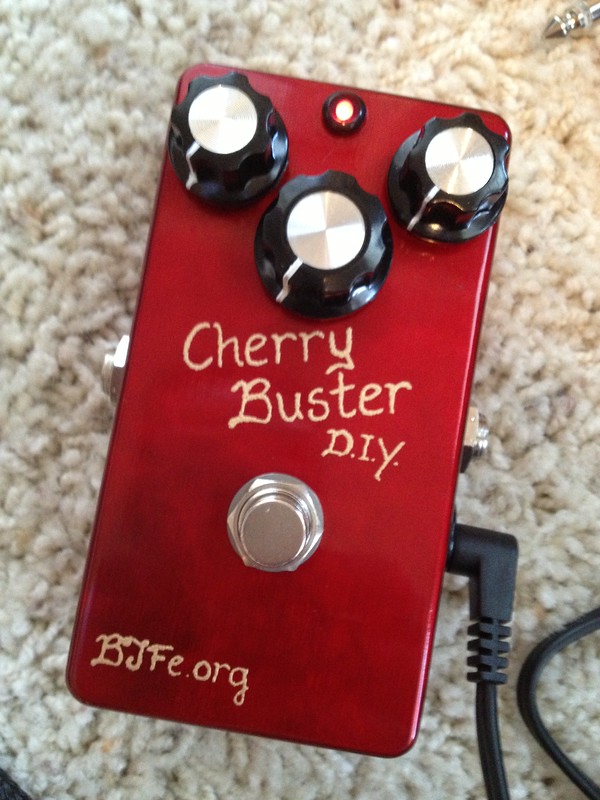
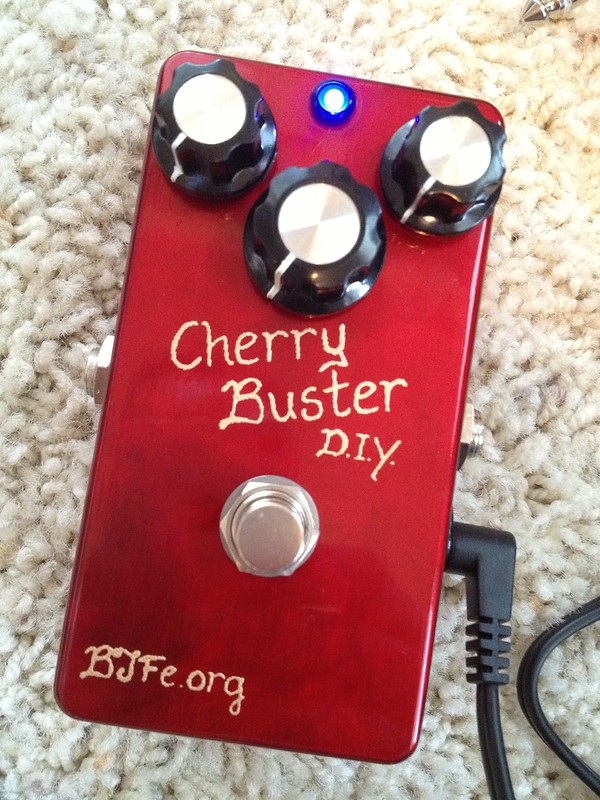
At long last, my Cherry Buster is finally complete -- although I put the wrong date inside :joker

It was definitely a lot to fit in one box but I'm really happy with how it all worked out. Pretty clean although it could probably be cleaner -- I'm used to having more space to work with. Anyway, here it is in all its glory. Gonna get a spot at the front of the chain if/when I ever wire up my board :music

Image

Image


Boost off (RED)

Image


Boost on (BLUE)

Image

Re: Cherry Buster Build Thread

PostPosted: Sun Feb 03, 2013 9:08 pm
by thesjkexperience
You didnt tip those tall things over?

I need to get moving on mine as the Bear found my sheet with all the parts taped to it.

Re: Cherry Buster Build Thread

PostPosted: Sun Feb 03, 2013 10:04 pm
by cajone5
thesjkexperience wrote:You didnt tip those tall things over?

I need to get moving on mine as the Bear found my sheet with all the parts taped to it.


It's definitely a snug fit. I would recommend laying them over for other folks doing the build. It is crammed in there pretty tight as shown. :clown But I had to show you could do it... but I don't recommend it.